Your cart is currently empty.
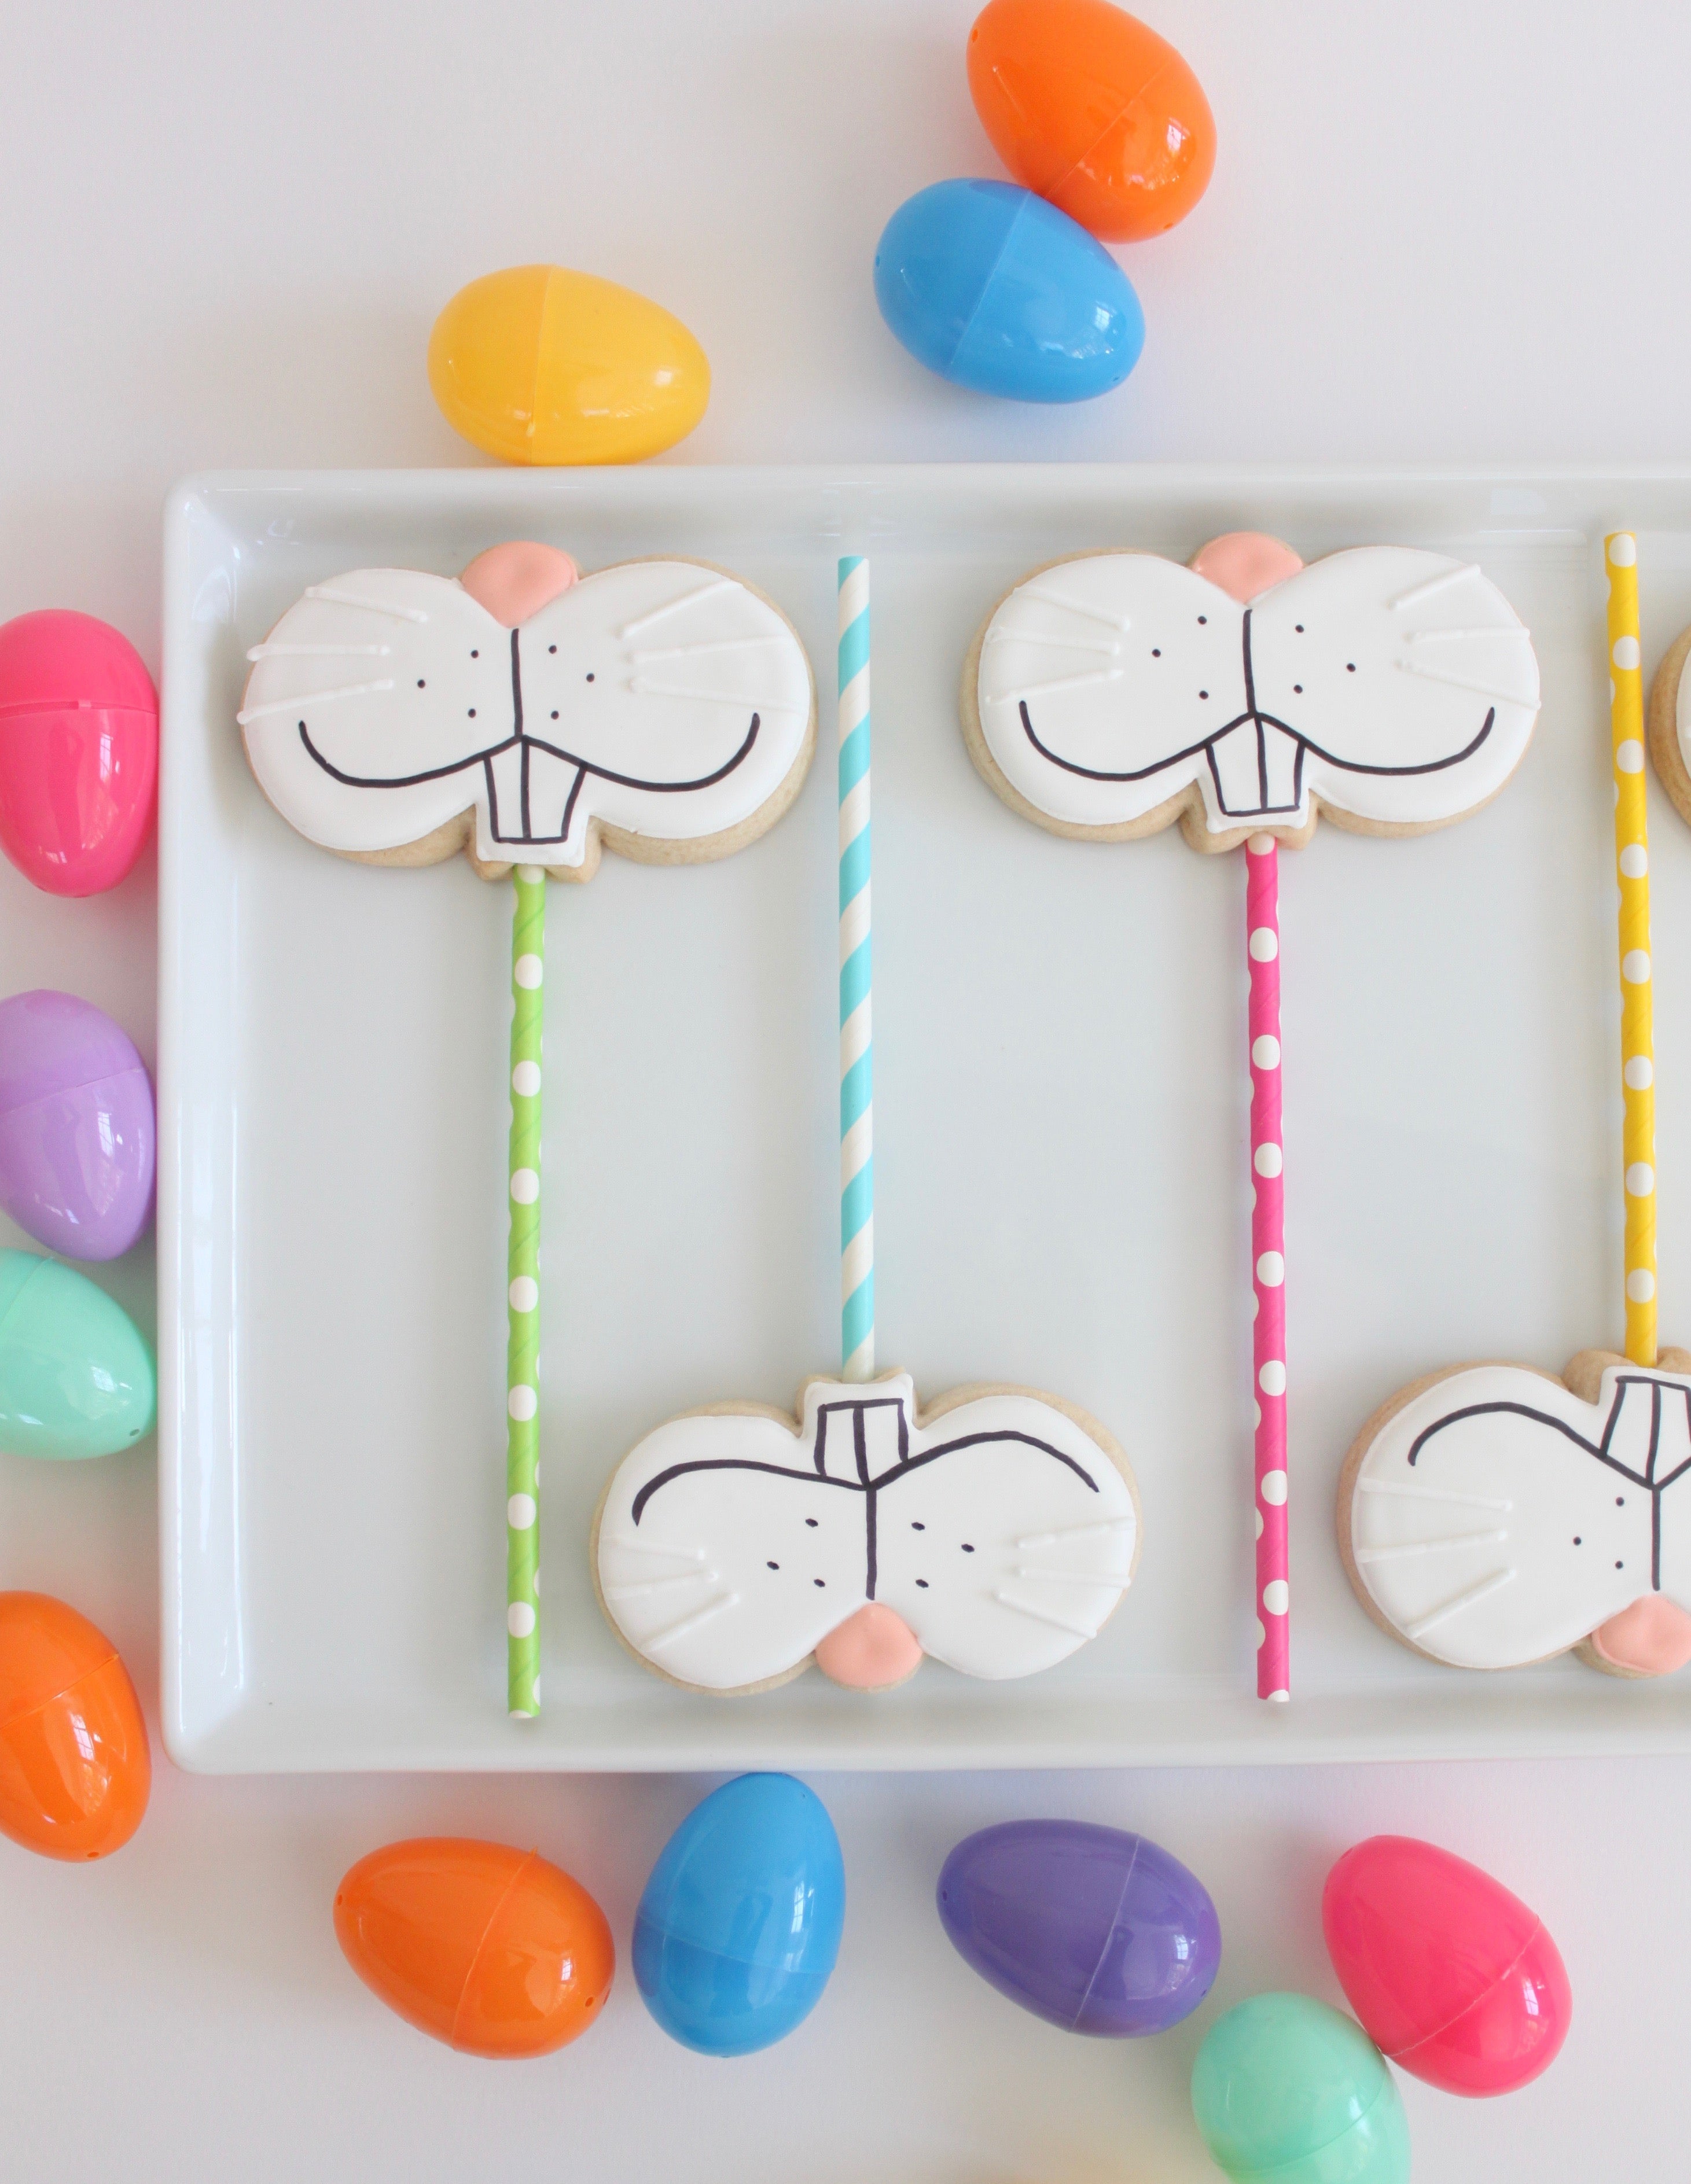
Hip Hop Hooray! We're sharing an Easter cookie tutorial today!
We thought we'd share with you a silly rabbit cookie tutorial to bring a little smile to your face and brighten your day!
Who's ready to learn how to make these super cute BUNNY FACE COOKIE POPS?

SUPPLIES NEEDED
Rolling Pin
Bunny Face Cookie Cutter
Paper Straws
Pink Americolor Gel
Black Americolor Edible Marker
Piping Tip #2
Piping Tip #3
Flood Bottle
INGREDIENTS
For the Sugar Cookies:
- 3 cups all-purpose flour
- 2 teaspoons baking powder
- 1/4 teaspoon salt
- 1 cup sugar
- 2 sticks unsalted butter, cold, cut into chunks
- 1 egg
- 1 teaspoon vanilla
For the Royal Icing:
- 4 cups confectioners’ sugar
- 1/4 cup meringue powder
- 1/2 cup water
INSTRUCTIONS
Make the Sugar Cookies:
1. Preheat oven to 350 degrees and line baking sheets with parchment paper.
2. In a medium bowl, combine flour, baking powder and salt. Mix well.
3. In the bowl of a stand mixer, combine sugar and butter and mix on medium speed until well combined.
4. Add egg and vanilla and mix well.
5. Gradually add flour mixture, scraping sides of bowl as needed until dough comes together.
6. Place wax paper on countertop and lightly flour surface.
7. Take half of the cookie dough and knead together and roll out to about 1/4-inch thickness with rolling pin.
8. Cut out bunny faces with cookie cutters and place striped straw into the bottom of the cookie about 1 ½” deep, then place onto prepared cookie sheet about 1 inch apart.
9. Place cookies into refrigerator for 20 minutes to chill. This will help the cookies keep their shape when baking.
10. Bake for 10 – 12 minutes.
11. Allow cookies to cool on pans for 5 minutes, then remove to wire racks to continue cooling.
12. Once cookies are cool, decorate with royal icing.
Make the Royal Icing:
1. In the bowl of a stand mixer, combine confectioners’ sugar and meringue powder and mix on low.2. Add water and beat on medium speed for 4 minutes until icing is fluffy and stiff peaks form.
3. Place icing in plastic airtight containers until ready to use.
4. Portion out icing into separate containers, using 1 container for each color you plan to use. It is best to work with about ½ cup to 1 cup of icing at a time depending on how much you need per color.
5. Use a toothpick and a small amount of gel coloring to tint icing.
6. To pipe details or outlines on cookies, place a small amount of icing in piping bag fitted with No. 2 round tip. Gently squeeze icing and trace the outline of your cookie or pipe snowflake details.
7. To flood cookies, thin the icing with 1 teaspoon water at a time. Stir icing with small spatula and continue to add water as necessary to reach desired flooding consistency. If you lift your spatula and the icing drips and falls back into itself after about 10 seconds, it is a good consistency.
* If you don't have the cookie cutter we used, no worries chances are you may have a heart cookie cutter on hand and you could decorate the cookies similar to this.
*You could also create a paper template and hand cut the cookies using the cutter shape as a guide.

Roll cookie dough to 3/8” thick. Cut out bunny face shapes with cookie cutter.

Place paper straw into the bottom of the cookie so the straw goes inside the cookie about 1 ½”.


Place cookies on prepared baking sheet so they are evenly spaced and alternating about 1 inch apart. Bake per the recipe instructions above.


Prepare white piping and flood icing per the recipe instructions above. Place white piping icing in a piping bag fitted with a coupler and tip #2. Place white flood icing in a plastic squeeze bottle. Next prepare pale pink icing for the nose based on a “20-second” rule (same concept from the recipe, thinning down icing a little at a time until you reach desired consistency) and place in a piping bag fitted with a coupler and a tip #3. You will just need a tiny bit of pink color gel to create the pale pink color.

Pipe the outline of the bunny cheeks and teeth part of the cookie using the white piping consistency icing.

Pipe and fill in the pink nose. Use the white flood consistency icing to fill in the cookie.

Allow the cookies to dry overnight before adding all the final details. Using a black edible marker hand draw the bunny checks and teeth.

Using the white piping icing add 3 whiskers to each cheek.

These Bunny Pops are an adorable addition to any Easter basket! You could even place them in a cello bag and tie with a ribbon for cute little favors!

We hope you enjoyed the step-by-step instructions to producing these buck-tooth-bunnies! You can also check out our video tutorial over on You Tube. If you make these happy little fellas we'd love for you to tag us in your photos on instagram at @ellenjaysweets. Wishing you all a Hoppy Easter!

