Your cart is currently empty.
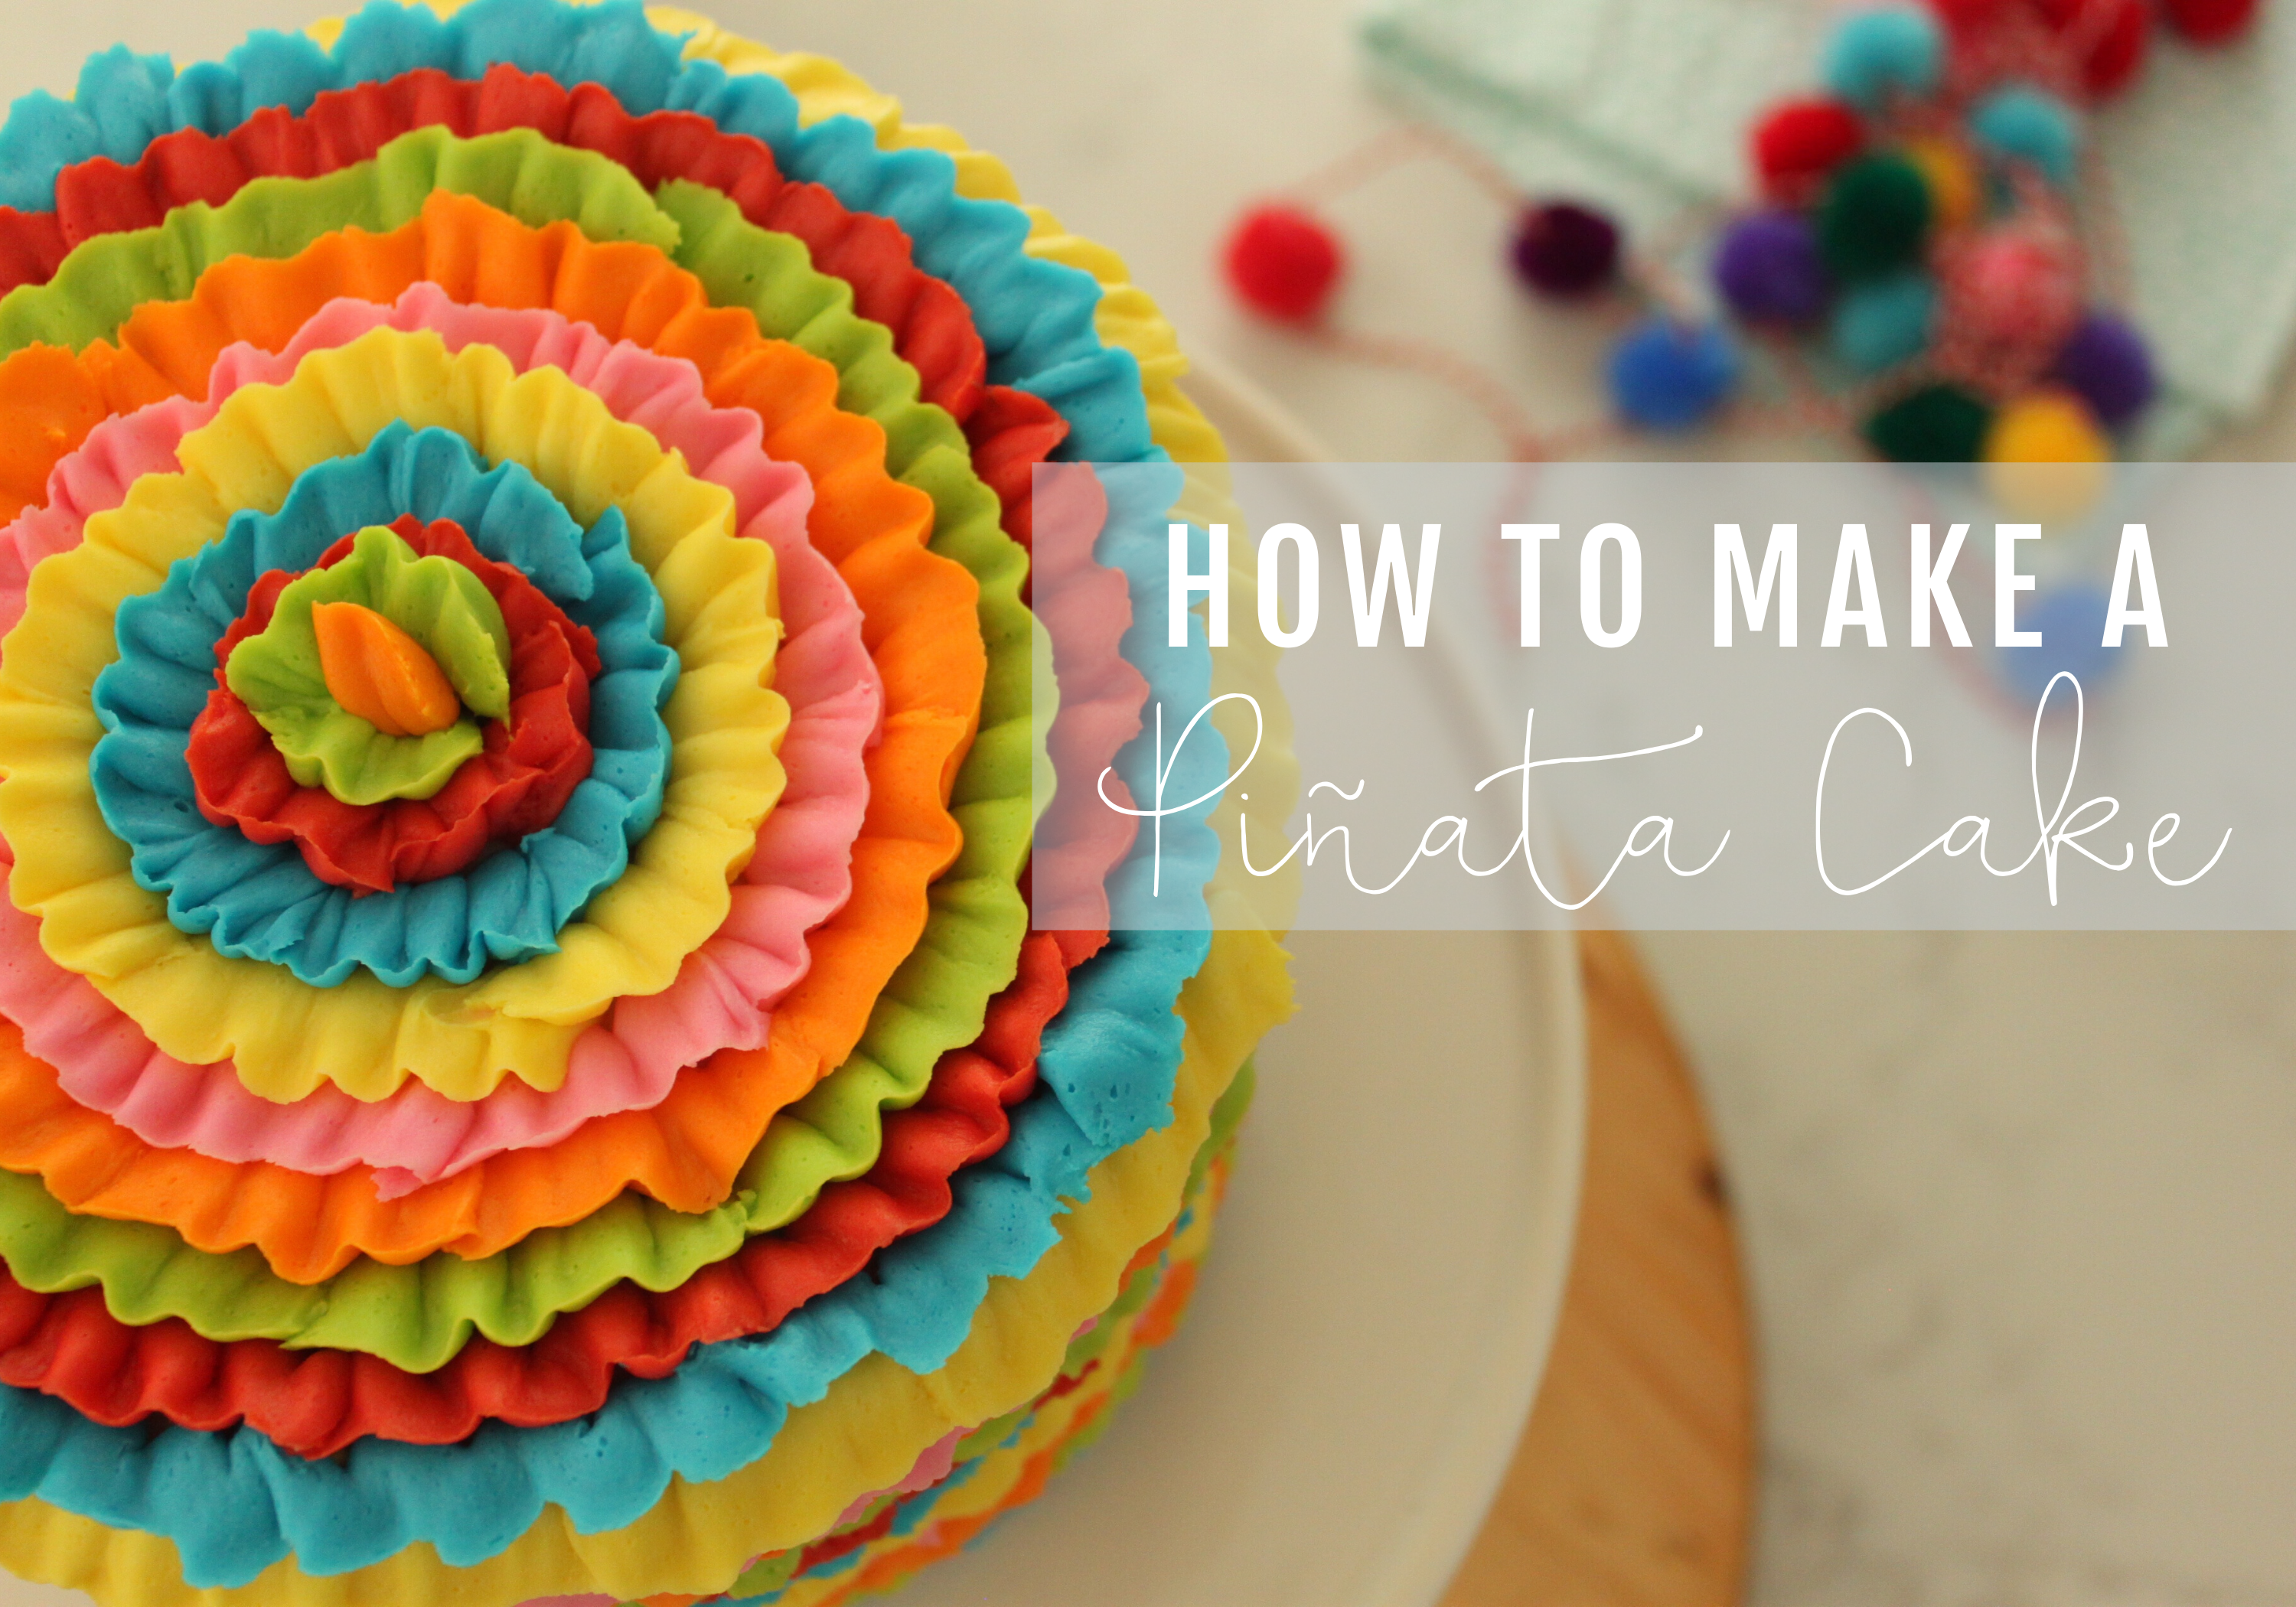

While you may not be able to celebrate Cinco de Mayo at your fave Mexican restaurant with your besties, you can totally bring the FIESTA home to your family with this incredibly cheerful Funfetti Piñata Ruffle cake! Get ready to learn the easy recipe and buttercream techniques (they're easy, too!! PROMISE!!) to create your very own edible piñata with your kids.

Team ellenJAY loooooves a good fiesta, y'all. How can you not be happy surrounded by margaritas, tacos and CAKE??! Did someone say cake? Let's get to bakin'...


FUNFETTI CAKE RECIPE
Yields: 3 6" cake layers + 9 cupcakes
⠀⠀⠀⠀⠀⠀⠀⠀⠀
3 cups cake four
1 3/4 cups sugar
1 Tbsp baking powder
1 tsp salt
2 sticks unsalted butter, softened, cut into cubes
5 egg whites
1 1/4 cups milk
2 tsp vanilla
1/2 cup rainbow sprinkles⠀⠀⠀⠀⠀
⠀⠀⠀⠀⠀⠀⠀⠀⠀
1. Preheat oven to 350 degrees and prepare 3 6" round cake pans with baking spray and parchment paper circles and place 9 cupcake wrappers in cupcake pan.⠀⠀⠀
2. In large bowl of stand mixer combine all dry ingredients: flour, sugar, baking powder and salt. Beat for 2 minutes on low until well combined.
3. Add butter a few cubes at a time beating on low until resembles coarse sand texture.
4. Add egg whites and beat on medium speed until well combined.
5. Add milk and vanilla and mix on medium speed 1-2 minutes until well combined, scraping sides of bowl as necessary.
6. Fold in rainbow sprinkles.⠀⠀⠀⠀⠀⠀⠀⠀
7. Pour mixture into prepared pans (1 1/2 cups per pan) and extra batter into cupcake wrappers.⠀⠀⠀⠀⠀⠀⠀⠀⠀
8. Bake cupcakes for 18-20 minutes and cake rounds for about 23-25 minutes (checking with a toothpick).⠀⠀⠀⠀⠀⠀⠀⠀⠀
9. Allow cake to cool completely then cover each layer in plastic wrap and place in fridge to chill for a few hours or overnight.⠀

VANILLA BUTTERCREAM RECIPE
4 sticks unsalted butter, softened⠀⠀⠀⠀⠀⠀
2 cups Crisco⠀⠀⠀⠀⠀⠀⠀
4 lbs confectioner's sugar
4 Tbsp vanilla⠀⠀⠀⠀⠀⠀⠀⠀⠀
1/2 cup milk⠀⠀⠀⠀⠀⠀⠀⠀⠀
⠀⠀⠀⠀⠀⠀⠀⠀⠀
1. In bowl of stand mixer combine butter, crisco and vanilla and mix on medium high for 2-3 minutes until smooth.⠀⠀⠀⠀⠀⠀⠀⠀⠀
2. Gradually incorporate confectioner's sugar 1 cup at a time and continue to mix on low speed.
3. Once all the confectioner's sugar is added, slowly add in the milk and mix until fully incorporated and smooth about a minute.
4. Separate the icing into 6 bowls (1 1/2 cup per color you plan to use) and then leave the rest white buttercream for stacking and crumb coating the cake.

STACKING + CRUMB COATING CAKE
6" cardboard cake round
long serrated knife
offset spatula
turntable
white buttercream
1. Trim the domed top off of each cake layer with a serrated knife so they are completely level.
2. Place your cardboard cake round on the cake turntable and place a small amount of the white buttercream on the board this will be your glue for your cake.
3. Add your first cake layer with the bottom side touching the board and then spread some buttercream onto the layer and smooth around using the backside of the offset spatula.
4. Stack a second layer on top face down so the bottom side of the cake is facing upward and spread more icing over this layer.
5. Place the final cake layer on top face down and add a big dollop of icing to the top of the cake and begin spreading it around with the back side of your spatula until it starts falling over the sides of the cake.
6. Get more icing and go around the sides of the cake using the back of your spatula while holding it vertically to cover the entire cake in a smooth layer of icing. Make sure your cake is straight and level and as smooth as possible, around the edges.
7. It's ok if there are crumbs in this icing since it will get covered up when you add the final layer of ruffled icing.
8. Chill your cake for about 20 minutes for it to set up before adding the colored ruffles.

Piñata Ruffle Technique
TO DECORATE WITH RUFFLES:⠀⠀⠀⠀⠀⠀⠀
6 Tip # 104⠀⠀⠀⠀⠀⠀⠀⠀
6 Couplers
6 Piping Bags
Pink Color Gel
Yellow Color Gel
Electric Green Color Gel
Orange Color Gel
Sky Blue Color Gel
Red Color Gel
Offset spatula⠀⠀⠀⠀⠀⠀⠀⠀
⠀⠀⠀⠀⠀⠀⠀⠀⠀⠀⠀
1. Separate buttercream into 6 bowls (1 1/2 cups ea) and tint each one with color gel: Pink, Yellow, Electric Green, Orange, Sky Blue and Red.
2. Prepare piping bags by placing the large piece of the coupler inside and then cut off the end of the piping bag with scissors.
3. Add the tip #104 on top of the coupler and then add the collar (the ring piece of the coupler) over top of the tip and screw on tight to secure the tip.
4. Place 6 icing colors in each piping bag filling only half way full. You don't want to over fill your bags as it will be hard to squeeze. You can re-fill as needed.
5. Plan your color sequence and start at the bottom of your cake to start the ruffle technique.
6. Hold the piping bag with the thin end of the tip facing outward and use your wrist to create an up and down motion quickly as you move around the cake to create the ruffle look. **TIP: practice this technique first on a piece of parchment paper to get a feel for the hand motion and ruffles before you commit to the cake**
7. Your other hand will need to be spinning the bottom of the turntable while your decorating hand adds the ruffles so the cake is in constant motion while you decorate.
8. Once you make it all the way around the cake with your first ruffle color pick up your next color and use the same technique but slightly overlap the second color ruffle over top of the first ruffle you just made. This will hide the crumb coat of icing so there is no white peeking through.
9. Continue this technique all the way up your cake alternating icing colors and overlapping ruffles until you make it to the top.
10. Once you are to the top you will use the same ruffle technique with the thin part of your piping tip facing outward. You will go around the cake in concentric circles one color at a time making ruffles.
11. Remember to keep overlapping each color ruffle slightly overtop of the one before and work your way all the way to the center of the cake until all the white is completely covered.⠀⠀⠀⠀⠀⠀⠀⠀
⠀⠀⠀⠀⠀⠀⠀⠀


Wanna watch a video of Lauren decorating this cake step-by-step?? Head over to our Instagram page @ellenjaysweets, go to highlights and click on the Piñata Cake icon.
Now that you mastered this Piñata Cake, you're OFFICALLY fiesta ready! This super yummy and festive cake is perfect for Cinco de Mayo or really celebrations all year round. This buttercream ruffle technique is so versatile that you can switch up the colors to be all one color (think pale pink ruffle for a ballet or princess theme party), ombre shades or even rainbow. We hope you all will give this cake a try because it showcases one of our favorite cake flavors and buttercream techniques!
If try this cake recipe at home, be sure to tag us on Instagram @ellenjaysweets
Nothin's Gooder Than Sugar!
- Lauren & Jennifer

